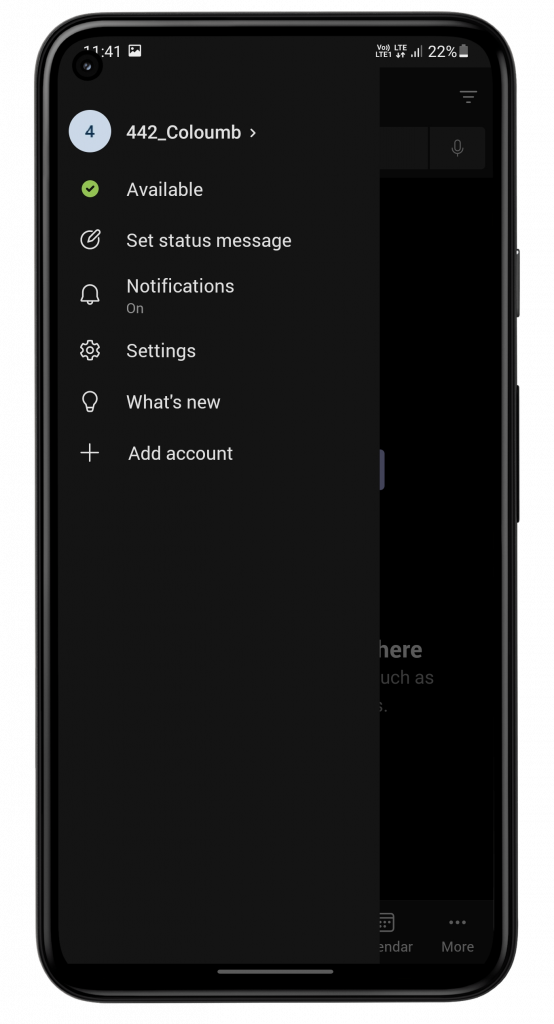
Login in MS Teams and click on Activity. Refer to below images for reference. For example, here the MS Teams name is 442_Coloumb.
Step 2 — Log in Using Student Access
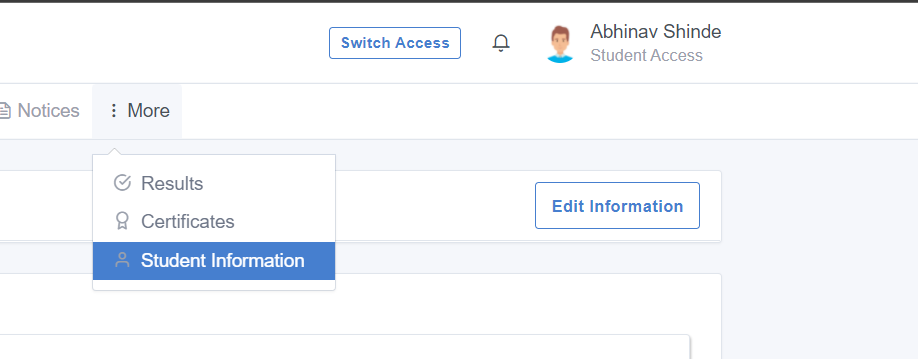
After logging in , you will see an option of More with 3 vertical dots on your top right corner. Click on it. Then, click on Student Information.
Step 3 — Click on Edit Information
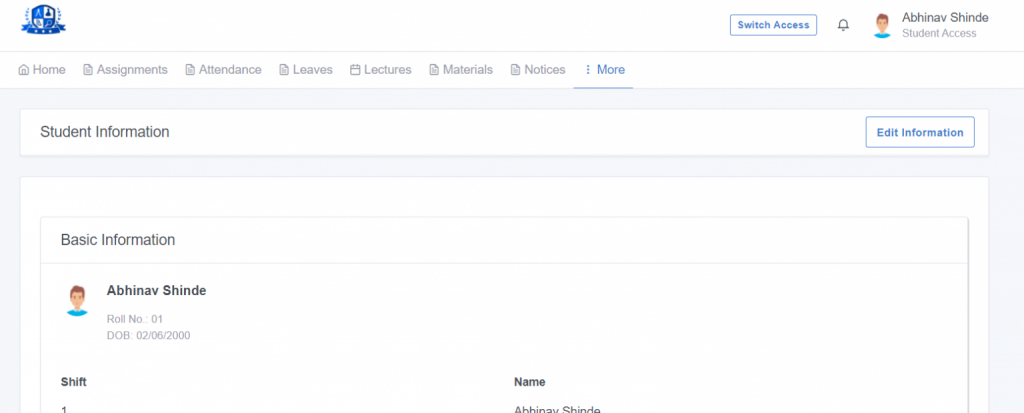
After this, you will be able to view the Student Information page. Click Edit Information button in the top right corner. Click on it. Refer to a sample image below. This is how your page might look like:
Step 4 — Tap On Update Information
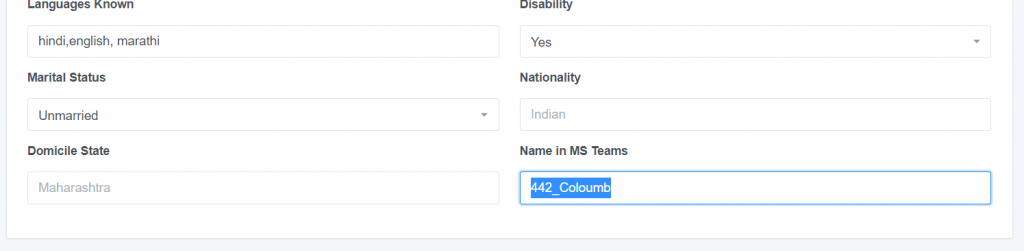
Look for Name in MS Teams, there you fill will be able to add your MS Teams ID. After filling it up,click on Update Information to save it.
Conclusion
In this guide, we gained the understanding on how to update MS Teams Name in Student Access using web portal.